
How do I add rows to a checklist or test form?
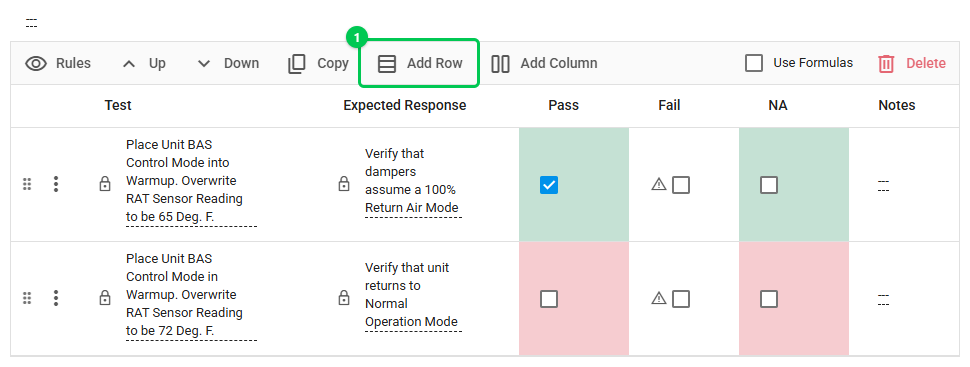
In the new Bluerithm (app.bluerithm.com) you add a row (a line or step) to a table that already exists with Add Row on the table's toolbar. This works on any checklist or test form, such as a functional test or a calibration record.
Account Admins and Users in the project's owning company can add rows, while online. Guests and Privileged Guests can't.
- Open the checklist or test form and find the table.
-
Click Add Row (1) on the table's toolbar.
-
An empty row is added at the bottom of the table (1). It has the same columns, locked cells and Pass / Fail / N/A rules as the table's last row. Click --- in a cell and type, for example the test step and its expected response.
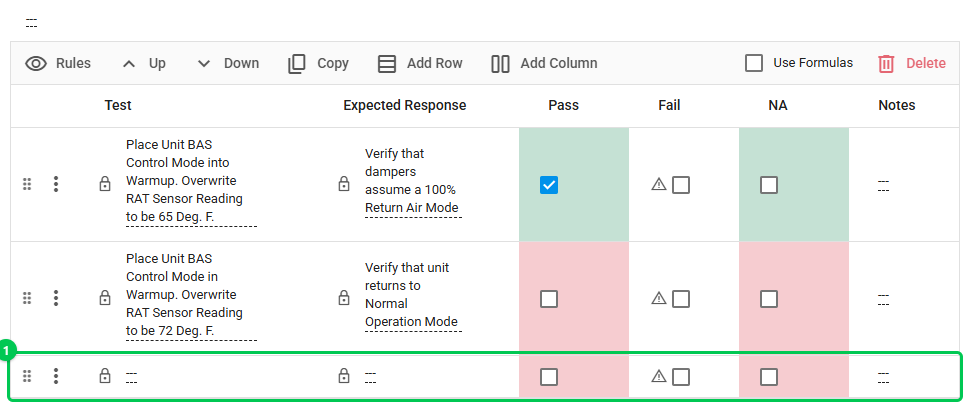
- Click Add Row again for each row you need. New rows always go to the bottom; to move one higher up, drag it by its handle (see Work Reorder).
To remove a row you added by mistake, click the row's menu (⋮), then Delete.
To add many rows at once, you can use Excel Edit on the work page instead (see Add Work with the Excel Editor).
In the legacy web app
In the legacy web app (trac.bluerithm.com), click Open above the table, type how many rows you need in the box above New Rows (up to 25 at a time) and click New Rows. The rows are added at the bottom. Type into them, then click Save and Close.